Showing posts with label Crafts/DIY. Show all posts

Thursday, December 24, 2020

Christmas Advent Calendar

Advent calendars can be fun to make if you have the time to do it. It will also brighten up your home if you use it as decor. As well as helping you count down the days until its time for the big celebration. You don't have to spend alot of money to make these as you can buy the little boxes at dollar tree. You can also use other items to add the numbers to your calendar not just what I have here. This calendar would still look awesome with the numbers painted on, stickers, bead numbers, etc.


Advent Calendar with Mini Boxes | this heart of mine


Tuesday, December 22, 2020

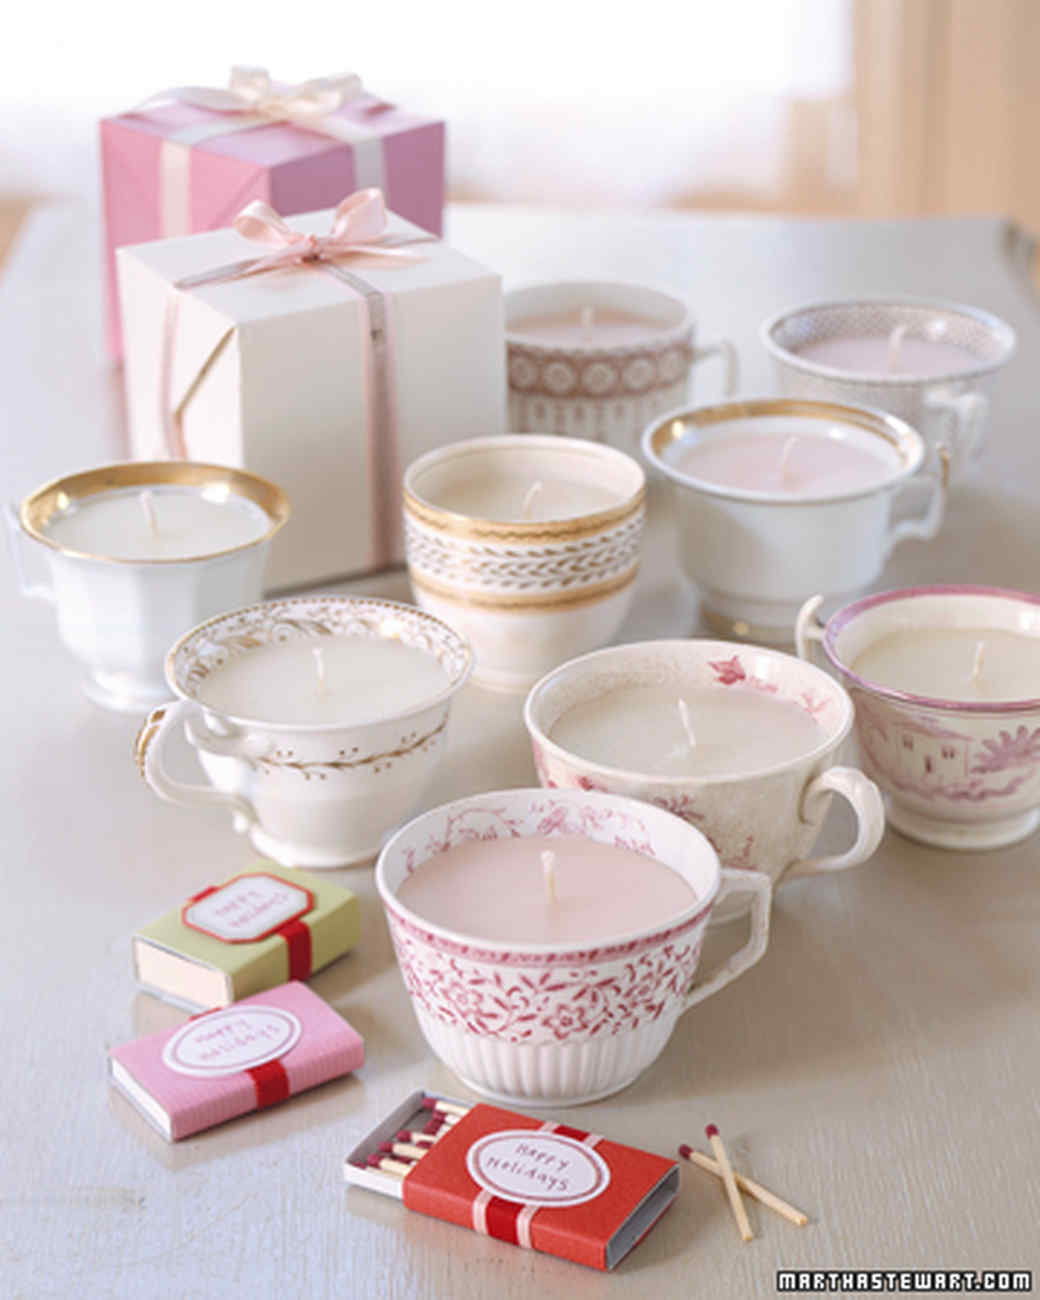
DIY Tea Cup Candles

 These candles will be perfect for mothers or mother-in-laws as well as aunts, cousins and sisters!


MATERIALS:
  • Nested pans
  • Partially burned candles
  • Candy or candle thermometer
  • Tongs
  • New wicking
  • Teacups
  • Wick sustainers
  • Wooden skewers

STEPS:
  1. In a small pan set over a larger pan of simmering water, melt down old candles; clip the thermometer to the upper pot, and keep temperature at about 185 degrees. Remove old wicks with tongs.
  2. Cut a piece of wicking to the cup's height plus 2 inches. Clamp one end to a wick sustainer; tie the other end around a skewer. Dip wicking and sustainer into melted wax to coat them. Remove and stick sustainer to cup's bottom.
  3. Pour in the wax, stopping 1/2 inch below the cup's rim. Allow wax to set, about 1 hour. The candle will harden with a well in the center. To even it out, use another skewer to prick a circle of holes about 1/16 inch deep around the wick. Pour in melted wax until surface is 1/4 inch below rim. Cut wick.

Monday, December 21, 2020

DIY Dollar Tree Centerpiece

 Need a festive Christmas centerpiece?! 

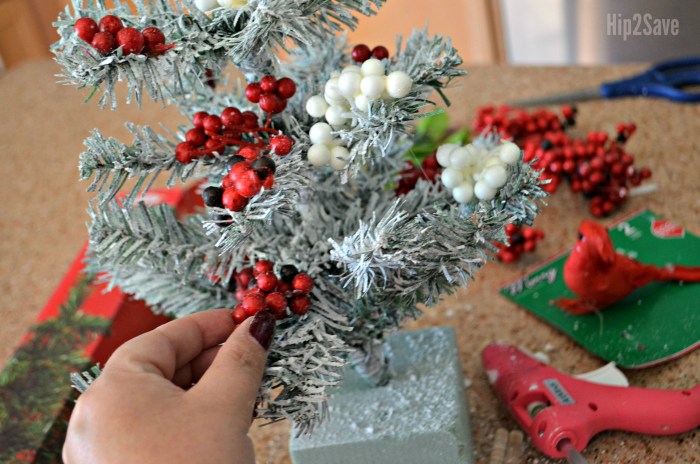
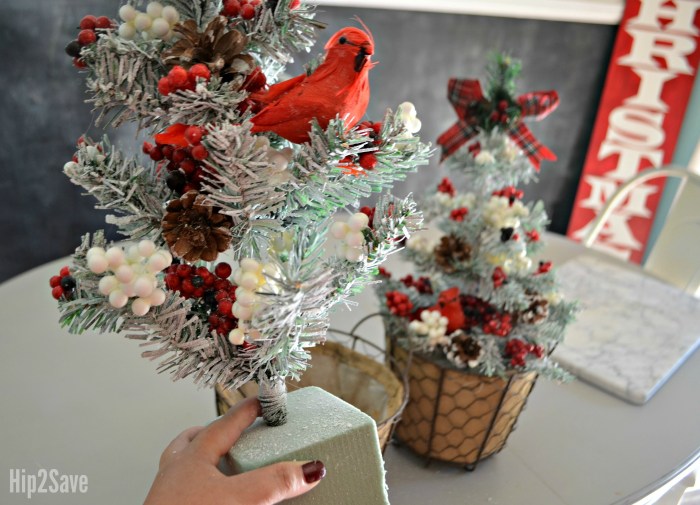
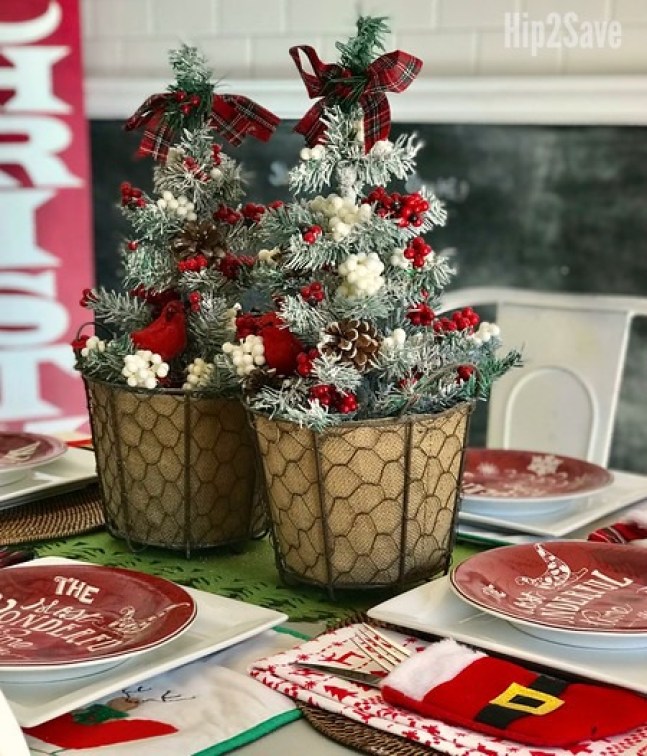
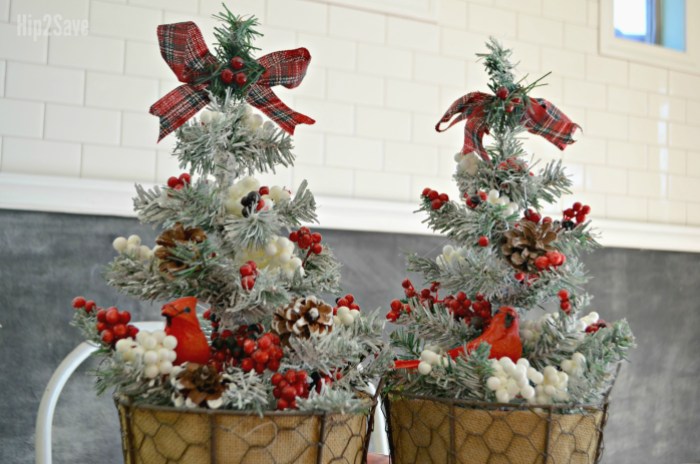
No one will be able to tell this little tabletop tree is actually from Dollar Tree after this easy makeover! Use faux snow and a few holiday floral embellishments, also found at the dollar store, to dress up this inexpensive $1 Christmas tree into a pretty centerpiece to be proud of.

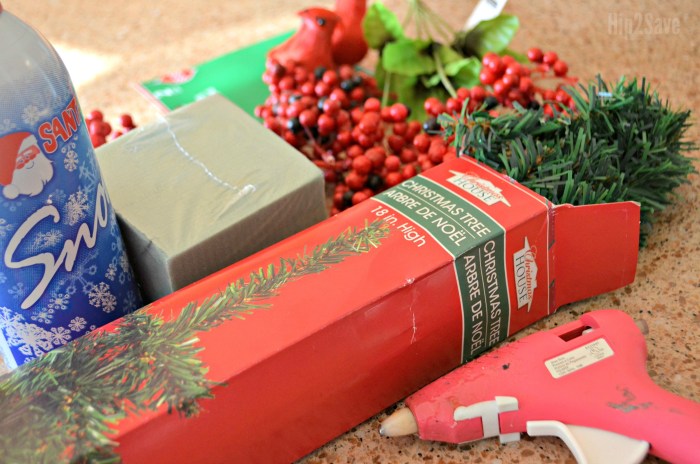
Supplies Needed:
  • 18 inch tabletop Christmas tree (Found in-store at Dollar Tree for ONLY $1!)
  • artificial snow spray
  • faux berries, small pine cones, and any other floral embellishments (Dollar Tree)
  • Christmas bow for topper (Dollar Tree)
  • hot glue gun and glue sticks
  • floral foam (Dollar Tree)
  • 7 inch planter, or some type of basket, box, or container
Directions:

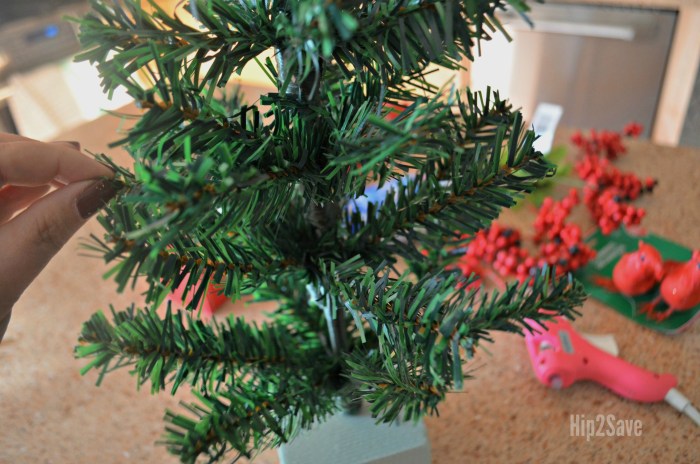
1. ) Take tree out of box and separate each branch. Instead of setting up the stand I used a piece of floral form to support it.


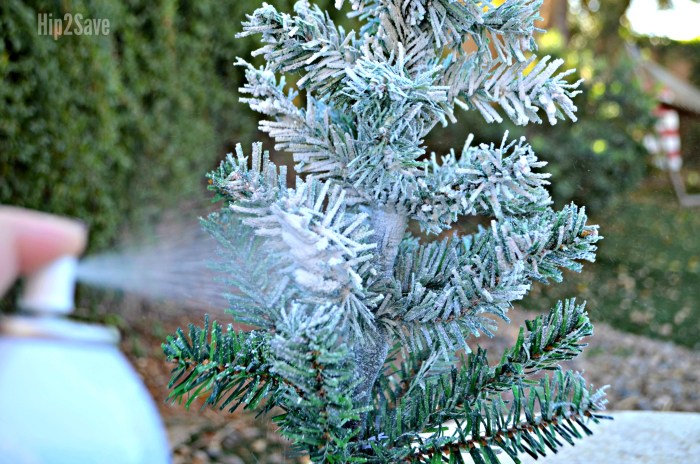
2.) Spray faux snow all over each tree branch, and let dry. (I found my can at Walmart for $1.50).


3.) Cut faux berries into smaller bundles and hot glue them to tree branches. Glue any additional embellishments. Try to make them evenly spaced throughout the tree.


4.) Place tree in a flower pot, basket, decorative box, bowl, or any other desired container. (I had these pots leftover from plants on my patio this summer. Look around the house for something to use!)


I’m passionate about decorating for Christmas without spending a ton of money, and these trees can be transformed into boutique looking decor with just a few easy supplies! I love how mine have kind of a farmhouse look to fit in with my house. You can customize them with any colors you’d like!

Saturday, December 19, 2020

DIY Glitter Lip Gloss

 Whose lips couldn’t use a little more shimmer?! This winter surprise the young girls in the family with this DIY glitter lip balm!


Supplies:

  • Coconut oil
  • Beeswax
  • Essential oil (peppermint and lavender are my favorites!)
  • Edible luster dust/edible glitter
  • Cosmetic container

Preteens Will Love This Simple Glitter Lip Balm

Step 1: Combine about 3 tbsp coconut oil and 1 tbsp beeswax in a small bowl. Microwave in 30-second increments until completely melted. Let cool 5 minutes.

Step 2: Mix in several drops of the essential oils of your choice.

Preteens Will Love This Simple Glitter Lip Balm

Step 3: Add in about 1 tsp luster dust or more to reach your desired color and shine.

Preteens Will Love This Simple Glitter Lip Balm

Step 4: Allow the glitter to settle in the mixture before dividing it into small cosmetic containers. Allow the glitter lip gloss to set before using.

Friday, December 11, 2020

Meal Planning

 As moms we are always busy, tired, and we still have to figure out what we’re cooking for supper each night. Or we need to figure out our kids lunches and snacks for the week. I have found a great way to help moms out with that little problem. The reason I chose this particular on is simply because it helps moms make a meal, snack, or lunch plan from what you already have inside your home as well as what you might need to buy. I think we can all agree that food is not cheap these days and if we can use what we already have and only have to add a few things, then it not only makes it easier on us as moms but it will also help us save a little time and money in the end.


I found this planning idea on a website that I recently visited (can’t remember which one, sorry!) Anyways, if you look at it you can see that everything was put into categories which will make it simpler to go by as you do your own.  In the first part of the list you would put what you already have on hand, the second is breakfast options, third and fourth you have lunch and dinner options, and then the fifth and sixth you have the snack option and the whats needed list. I have found that if I do this at the beginning of each week the better it works for me ( usually Monday sometimes Sunday night if I have time). Good luck with your planning and I hope this helps a mom or to out!


Thursday, December 10, 2020

DIY Wide Leg Pants


How to Make Paper Bag Pants

For this project, we will only be using the leg portion of our DIY palazzo pant pattern. Set the waistband aside.


Cut 2 leg pieces from the DIY Palazzo Pant Pattern and fold in half, right sides together. Pin along the outside seam all the way up the leg.


Use a standard straight stitch to sew up the entire length of the leg. From here, you will have 2 separate leg pieces that look like long tubes.


Attach the two leg pieces by pinning the center front together and working your way around the crotch until you line up the center back. Make sure the “right sides” of fabric are facing each other, or the sides that you want to show when you are finished with your pants.


Now it’s time to get creative and make the paper bag waistline! Slide your unfinished pants on to be sure the hips are wide enough (they may look like clown pants at this point-stay with me.) If your pants are big enough to pull on comfortably, then take them off and lay your pants flat on a table.


To create the paper bag waistband, measure the distance of the top of your pants and double that measurement so your waistband can circle your pants. Add 1 1/2″ for seam allowance and some extra room. Write that number down.

Now that you know the measurement of your new waistband, it’s time to cut! Cut a long rectangle 6″ tall and your new measurement wide. Fold the long rectangle in half hot-dog style and start pinning around the top of your pants beginning at the center front.


Once your basic waistband is sewn in place, iron it flat and tuck in the extra seam allowance. Your paper bag pants should be looking similar to this:


The last step in creating the paper bag waist of your pants is to top-stitch a straight line 1″ above the seam of your 3″ waistband. This creates the casing for your drawstring and the additional fabric needed to create the paper bag look. Sew the top, larger casing shut.

(Since we began with a 6″ rectangle to create the waistband and folded it in half, you should have a 3″ wide waistband.)


Now the only thing left to do is create the drawstring. To do this just cut a 2″ long strip of fabric. I like to use a piece longer than I think I’ll need because you can always trim it later to your liking.


Fold your 2″ strip of fabric in half hot dog style. Sew it in place using a straight stitch.
Attach a sewing pin to the end of one side. Close the sewing pin so it’s smooth on either end and slowly feed it through the tube, flipping it inside out.
Work your way down the tube of fabric, slowly turning it inside out along the way. When you are done, tie a knot on either end to prevent fraying.


The last and final step to make these paper bag pants is to finish the hem of your pants. After that comes the best part- you get to wear your new creation!


Thursday, December 3, 2020

Cute No-Sew Handbag

Did you know you can make a beautiful handbag without sewing a single stitch? Find out how to make a no-sew handbag now in a few easy steps.


TOTAL TIME: 15 minutes
DIFFICULTY: Easy
ESTIMATED COST: $3


Materials:

Leather or fabric
Scarf or cloth headband, preferably with wire inside
Thin belt
Large circular object to trace around

Tools:

Pen
Hot glue and glue gun
Scissors

Instructions:

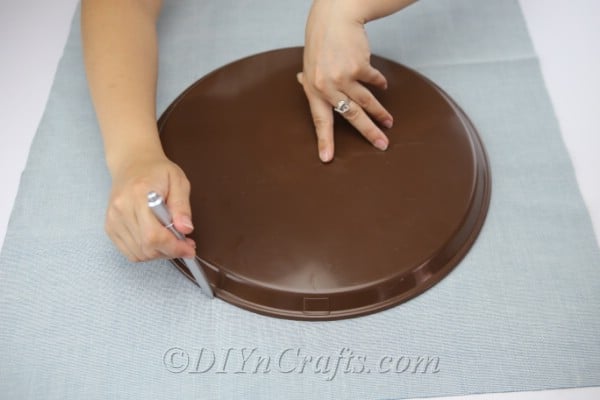
Your first step is to lay your fabric out flat and place the large circular object you have selected on top of it. Use a pen to trace around the perimeter of the circular item so that you have a circle on your fabric.


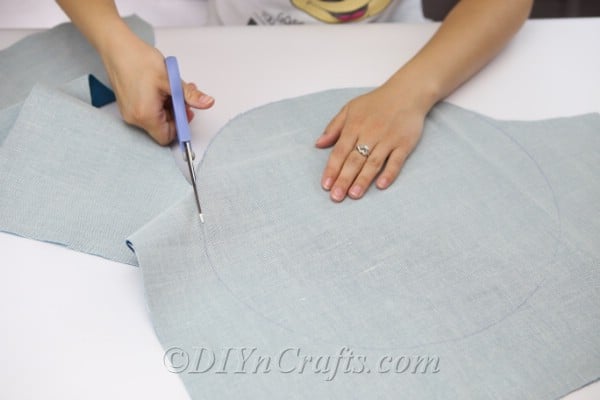
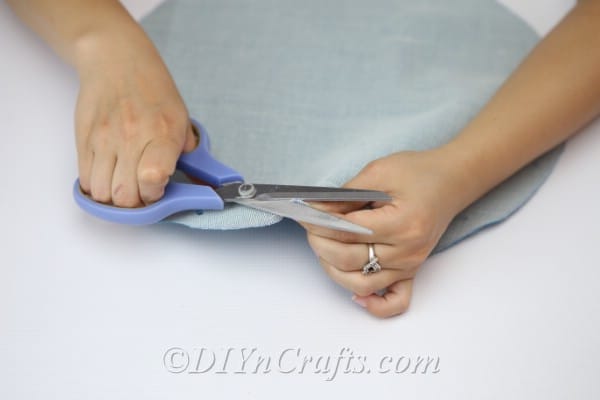
Use your pair of scissors to cut out the circle from the fabric.


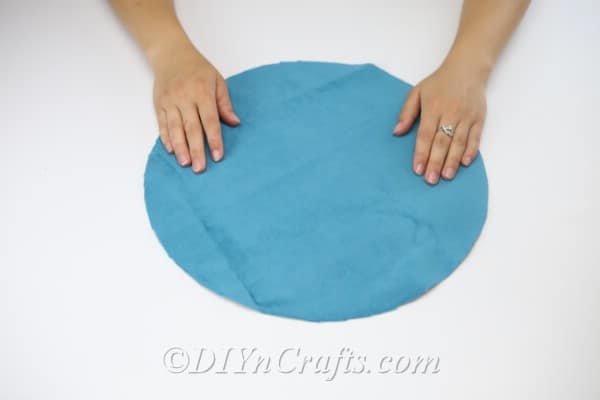
Lay the circle of fabric out flat in front of you with the side you want to be on the outside of the handbag facing upward. For me, this is the blue side, so that is how I will refer to it from here on out, with the other side being the white side.

Fold the circle in half. The white side will now be facing outward.
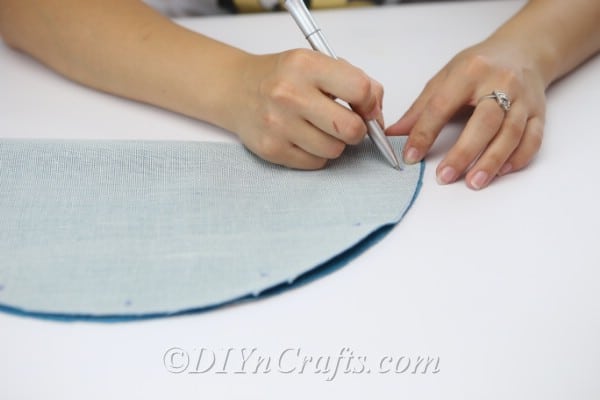
Using a pen, mark some equidistant spots along the perimeter of the semi-circle. Note that these should only go along the curved edge. They should not be on the very edge. They should be positioned inward a little bit, maybe a few centimeters or so.


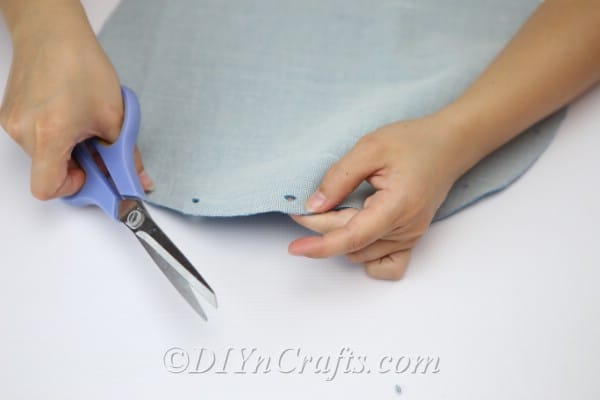
Use a pair of scissors (or a hole puncher, if you have one!) to cut out little holes where you placed your marks.


Now, you're going to fold the circle in half again, but you are going to do it the other way around so that the blue side is facing outward.
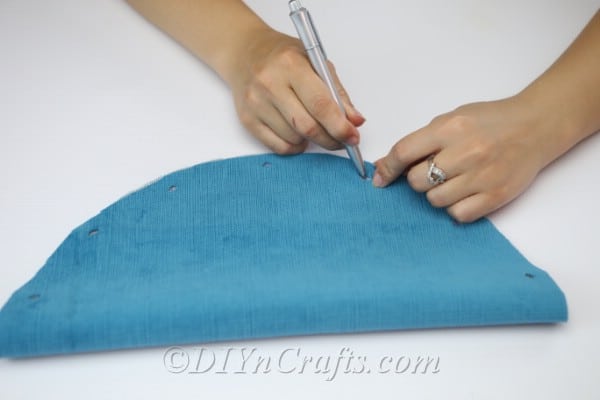
Use your pen to mark through the holes that you cut. This will make a second matching set of marks on the other half of the circle where you did not create them before. Because you put the blue side on the outside this time, when you marked through the holes, you only marked the white side of the fabric. You will probably cut around the marks completely, but just in case you don't, this way you know that they are hidden.


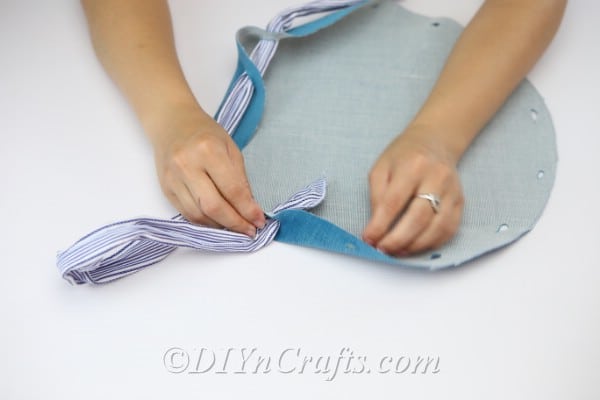
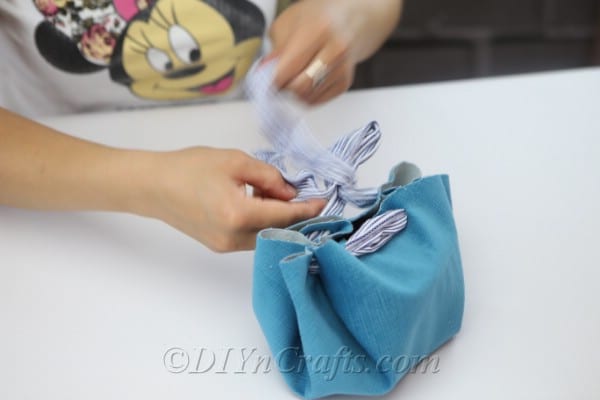
Take the scarf or cloth headband, and weave it through the holes back and forth around the entire perimeter of the circle. Technically, these are stitches, but since we are not using needle and thread and sewing in the traditional sense, I still consider it to be a no-sew project.


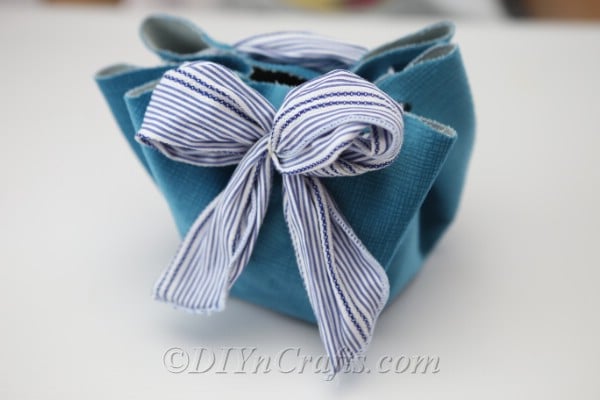
When you have pulled the scarf through all of the holes, the two ends should emerge on the outside (blue side) of the fabric. You can then tug on them gently, and they should work like a drawstring, closing the bag. It is magical to see a flat circle suddenly transform into a usable handbag!


You can tie the two ends of the ribbon into a cute bow to finish off the look of your bag. You can, of course, untie this bow if you need to get the bag wide open in the future, or pull it more tightly closed and retie it if necessary.


DIY Christmas Cards

 If you want to do you own christmas cards this year then here is a simple way for you to do that! And you can personalize them any way you like!


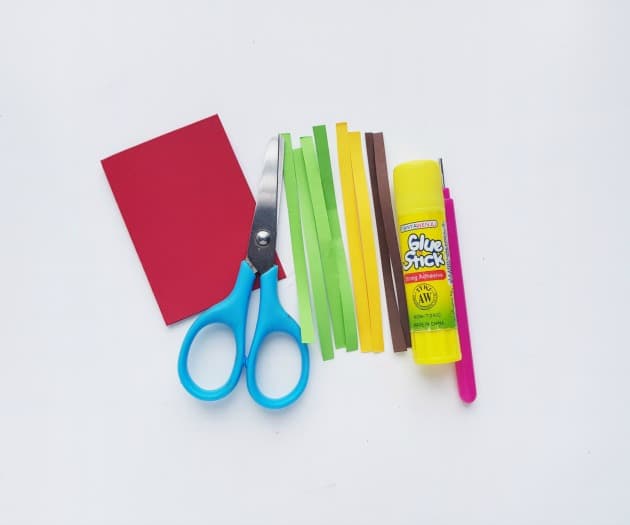
DIY CHRISTMAS CARDS SUPPLIES:

  • Paper quilling strips
  • Slotted quilling tool
  • Cardstock paper
  • Scissors
  • Craft glue

Supplies

DIY CHRISTMAS CARDS INSTRUCTIONS

Step -1:

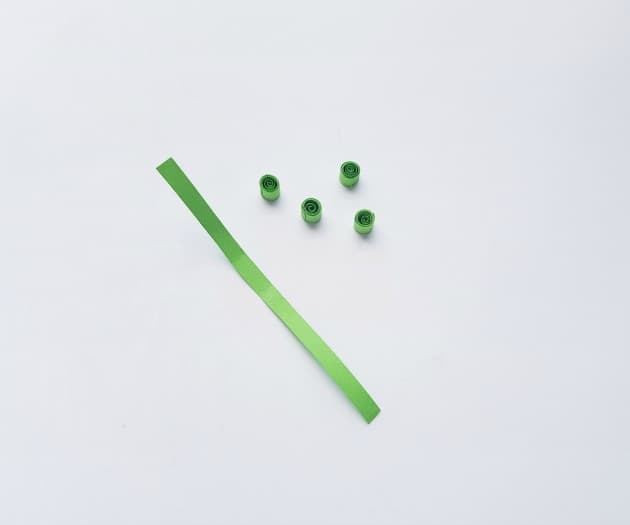
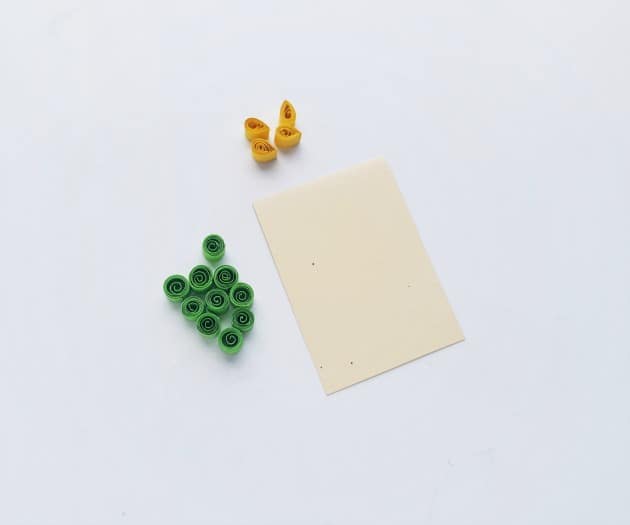
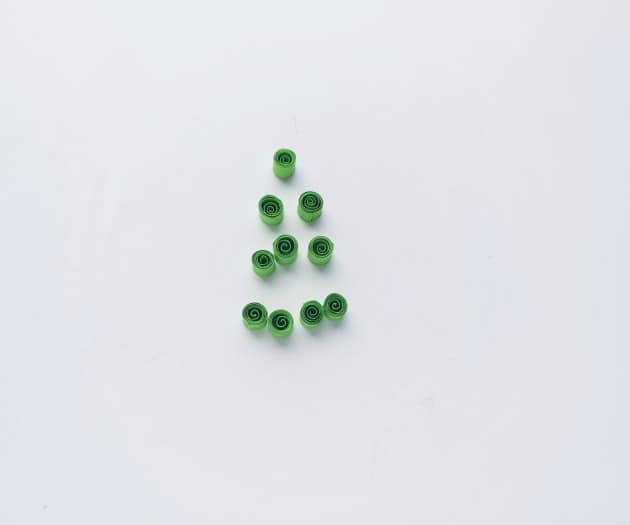
To start, you can sketch a simple outline for the quilled patterns. To make the quilled Christmas tree I’m using 10 loose coils, 4 teardrop shapes, and 1 square shape.

Select green colored quilling strips and prepare them all into the same size. Use the green strips to make loose coils.

Green colored quilling strips

Step -2:

Try to keep the size of the green loose coils as even as possible.

DIY Christmas Cards

Step – 3:

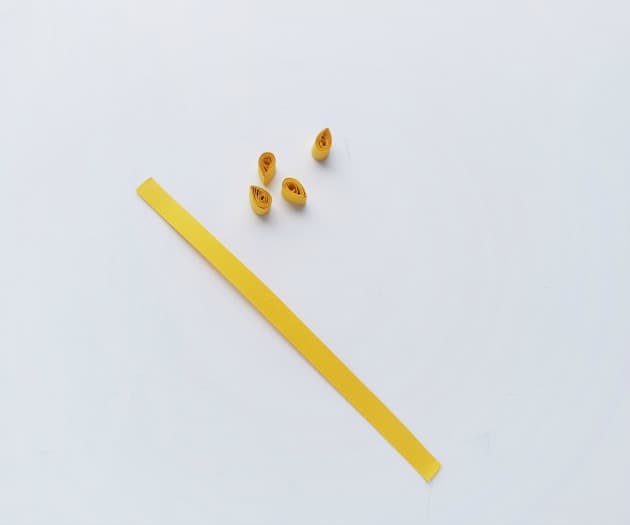
Grab 4 yellow colored strips for the star. Or you can also select any colored strip as you want. Use the yellow strips to make teardrop shapes.

Yellow colored strips

Step – 4:

Done making the teardrops? Prepare a piece of cardstock paper into any size you want but make sure that the quilled art would fit nicely on it. Your Christmas cards will look amazing!

DIY Christmas Cards

Step – 5:

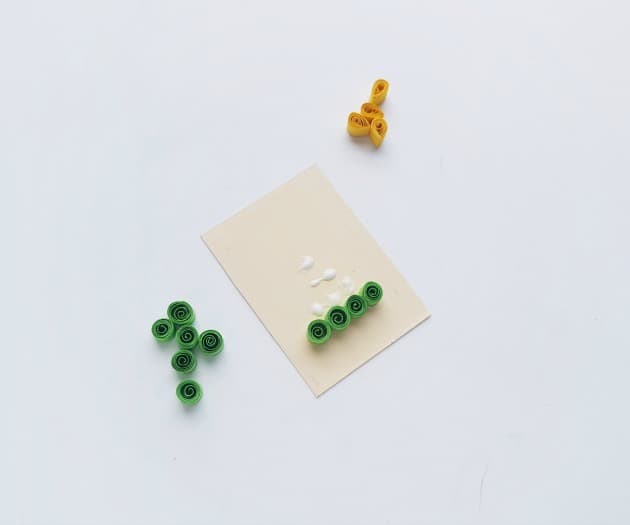
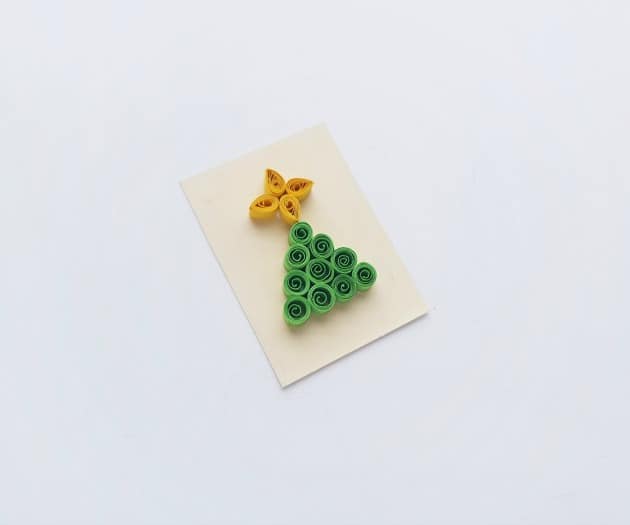
You can either apply glue on the cardstock paper or apply glue on the backside of the quilled pieces. To create the tree pattern I’m attaching 4 loose coils on a row near the bottom side of the cardstock paper.

DIY Christmas Cards

Step – 6:

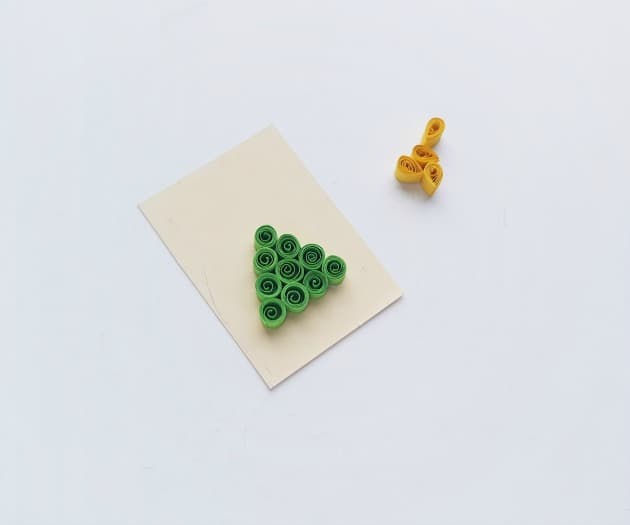
And then I’ve attached 3 loose coils to the next row on the top of the bottom one. For the third row, I’m using 2 loose coils and then finally 1 loose coil on the top.

DIY Christmas Cards

Step – 7:

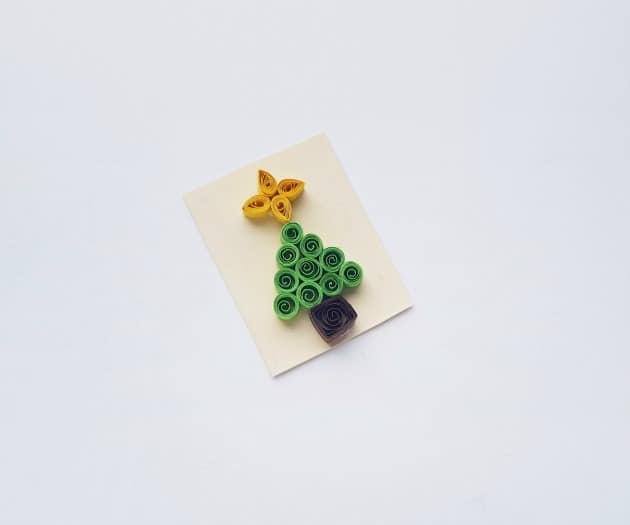
Attach the 4 teardrops on the top end of the quilled tree. Use the 4 teardrops to form a 4 point star.

DIY Christmas Cards

Step – 8:

And lastly, prepare a square quilled piece from a brown colored quilling strip and attach it on the bottom side of the quilled tree.

DIY Christmas Cards

Step – 9:

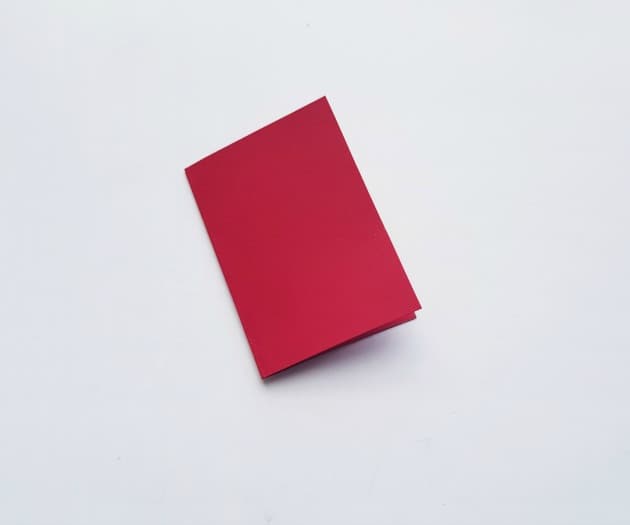
Select a colored cardstock paper of your choice and prepare a Christmas card from it. The card should be at least a cm bigger on all sides from the quilled art cardstock paper.

DIY Christmas Cards

Step – 10:

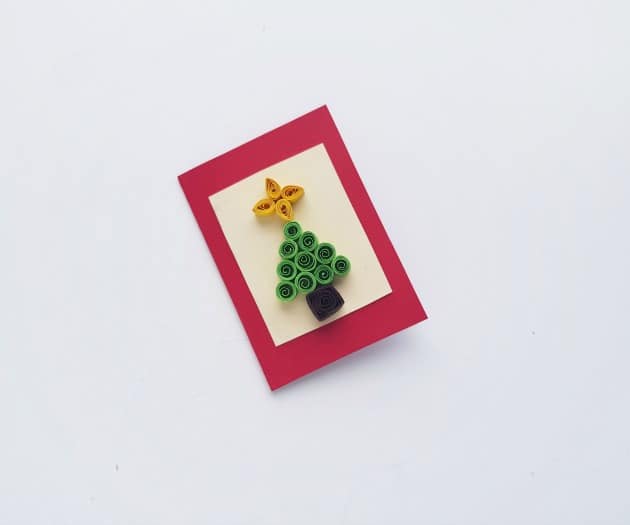
Attach the quilled art cardstock on the front side of the card. Allow the glue to dry.

DIY Christmas Cards

You can also create more simple quilled patterns and make other Christmas cards with them.
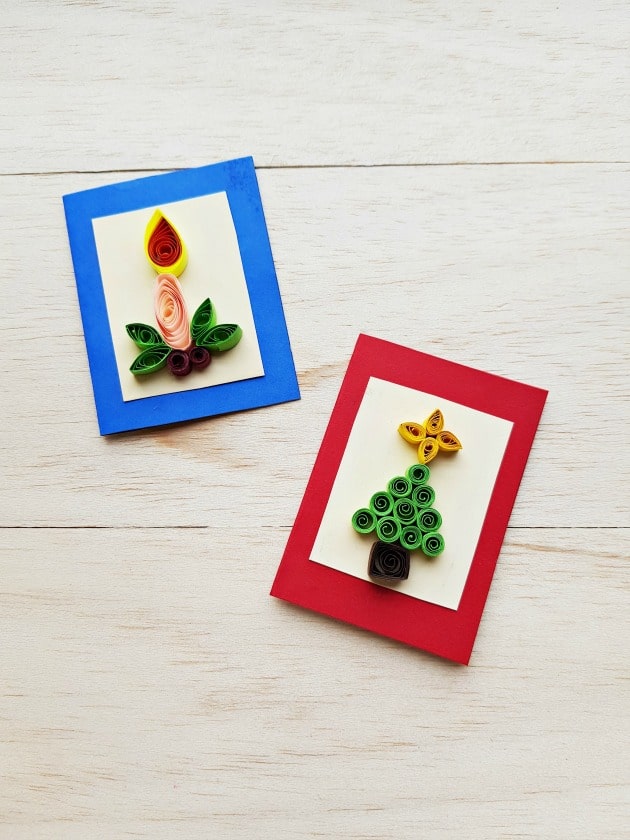
DIY Christmas Cards
I HOPE YOU ENJOY MAKING THESE CARDS THIS YEAR!

Wednesday, December 2, 2020

Washi Tape Christmas Card

 This Christmas tree craft is easy for kids to do as well as fun!!!! 

Materials:

  • Christmas Washi Tape
  • Star Sequins  or Gold & Silver Star Stickers
  • Glue Sticks
  • Blank Cards & Envelopes – White
  • Cardboard

Easy kid made Christmas cards. These homemade washi tape Christmas cards are perfect for children to make and they look amazing.

This is a great activity as it is low mess, but also one that kids of most ages can do themselves. I have started to pout all that the boys need out in a plastic dip tray as in invitation to create.  It looks great, keeps everything they need together and allows for their creativity to take over.

This really is a super simple activity and the brilliance of traditional washi tape is that it is paper and so can be torn easily.  We also had some plastic coated tape so the boys cut that to size.