Monday, November 30, 2020

Mini Clothes Pin Wreathe

 These little wreathes are just the cutest things ever!!!!!!!!!

Homemade Kid Christmas Ornament

Supplies:

  •  Wooden Mini Clothespins (Green) 
  • Fiberboard (I used a fruit snacks box)
  • Green paint
  • Red Ribbon
  • Glitter (optional)
  • Scissors
  • Glue Gun

Instructions:

1. I used the lid from my Starbucks to trace the wreath on a piece of fiberboard.  I cut out the traced circle and placed a few of the clothespins onto the circle and traced the inside circle.  I took the clothespins off and cut out the center of the wreath.

homemade Kid Christmas ornament


2. Have your child paint the piece of fiberboard (your wreath) green and allow to dry.

3. If you need to paint and/or glitter your clothespins, do that now.  Once your clothespins are ready, have your child place them around the wreath. 
 
4. Cut a piece of ribbon for the bow and hook to attach the ornament to the tree.  Use a glue gun to attack the bow to the front of the wreath.  Make a loop from the other piece of ribbon and attach to the back of the wreath for a hook.  


Homemade Kid Christmas Ornament

Sunday, November 29, 2020

Instant Pot Cheeseburger Soup

 Whether you're attempting the keto diet, or simply looking for more low-carb meal ideas, this Instant Pot keto cheeseburger soup is perfect to have for dinner (or lunches!) throughout the week.

bowl of keto cheeseburger soup

Ingredients :

  • 1 lb. ground beef
  • 1 cup diced onions
  • 1 cup chopped carrots
  • 1 cup diced celery
  • 3 cups beef broth
  • 1/2 tsp paprika
  • 1 cup heavy cream
  • 1/2 cup sour cream
  • 1 cup cheddar cheese
  • Chopped fresh parsley
  • Bacon crumbles

Directions:

  1. Turn on the Sauté feature for the Instant Pot. Once warm, cook the ground beef inside the Instant Pot. Drain the excess grease into a can.
  2. Add in onions and cook for 1 minute. Then add in the carrots, celery, beef broth, and paprika.
  3. Place the lid on top and switch the Instant Pot to manual (Pressure Cook). Cook on high pressure for 5 minutes, seal closed.
  4. Once the timer goes off, let the pot depressurize by itself for 10 minutes, then release the rest of the pressure.
  5. Switch it back to the Sauté feature and add the heavy cream, cheddar cheese, and sour cream. Stir until fully combined and warmed through.
  6. Scoop into bowls and top with bacon bits, parsley, and extra cheddar cheese if desired.

Saturday, November 28, 2020

Keto Peanut Butter Cookies

  Followers of the keto diet stick to a low-carb meal plan, getting energy and nutrients from protein and fats instead. Peanut butter is a great source of both, and it makes a delicious base for these cookies.

keto peanut butter cookies

Ingredients :

  • 1 cup unsweetened, unsalted peanut butter (smooth or chunky; I used Trader Joe's Organic Creamy No Salt Peanut Butter)
  • 1 large egg
  • 1/3 cup (64g) Swerve Brown sweetener
  • 1/4 tsp fine sea salt
Directions:

1. Preheat oven to 350ºF; line a large baking sheet with parchment.
2. In a bowl, combine all ingredients and stir with a wooden spoon until well incorporated. Use a 1-tablespoon scoop or two spoons to portion dough. Roll into balls and place 1 inch apart on baking sheets. Use a fork to flatten and create a crisscross pattern.
3. Bake until cookies are golden around the edges but still slightly soft in the middle, about 9 to 11 minutes. Let cool on baking sheet on wire racks for 5 minutes, then transfer cookies to rack to cool completely. Store leftovers covered in the fridge.

Friday, November 27, 2020

Pinecone Pom Pom Ornament

 These little ornaments are simple and fun. Anyone can make them!

These are super easy! And they look amazing! 
Here’s what you’ll need:
  • Pinecones
  • Tiny pom poms
  • String or ribbon
  • Hot glue gun
These pom pom and pinecone ornaments are SO EASY! They're a great craft for both kids and adults and they end up looking surprisingly beautiful!These pom poms are really small. I got them from the dollar store and they were the perfect size to fit in the pinecones.DSC_9205Start by adding a small glob of hot glue to the underside of the pinecone “branches”.These pom pom and pinecone ornaments are SO EASY! They're a great craft for both kids and adults and they end up looking surprisingly beautiful!These pom pom and pinecone ornaments are SO EASY! They're a great craft for both kids and adults and they end up looking surprisingly beautiful!Repeat for all the the pinecone tips. The little pom poms look just like ornaments hanging from a tree!These pom pom and pinecone ornaments are SO EASY! They're a great craft for both kids and adults and they end up looking surprisingly beautiful!These pom pom and pinecone ornaments are SO EASY! They're a great craft for both kids and adults and they end up looking surprisingly beautiful!Then take about 11″ of string or ribbon and hot glue it to the top of the pinecone. We used this gold chain looking ribbon from the dollar store. I was pretty generous with the hot glue and they feel pretty secure.These pom pom and pinecone ornaments are SO EASY! They're a great craft for both kids and adults and they end up looking surprisingly beautiful!Maybe I’m a risky mom here, but I let both my three year old and five year old use the glue gun. They were sooooo excited and they actually did really well with it! It’s just one of those cheap, tiny glue guns, so it doesn’t get very hot.
I had to peel away a lot of glue strands when they were finished, but they cleaned up really well. And now my girls are going to be so excited to hang them on the tree!
It’s still way too early to put up the Christmas tree, so I had to improvise a little bit for the photos. Yup, that’s the kids swing set in the background of this next photo!
These pom pom and pinecone ornaments are SO EASY! They're a great craft for both kids and adults and they end up looking surprisingly beautiful!And I never realized it, but we don’t have any evergreen trees on our property. So this next photo uses a branch that hangs over our fence by about 18″. Of course our neighbour walked out into the backyard at exactly the same time I was shooting these photos. She probably thinks I’m a bird watcher now. But on the bright side, the branch gives a nice preview of what these ornaments will look like on the Christmas tree.These pom pom and pinecone ornaments are SO EASY! They're a great craft for both kids and adults and they end up looking surprisingly beautiful!They’re really simple, but I love how they look natural and quirky at the same time!These pom pom and pinecone ornaments are SO EASY! They're a great craft for both kids and adults and they end up looking surprisingly beautiful!These pom poms and pinecones Christmas ornaments are so easy! They’re a great craft for both kids and adults and they end looking surprisingly beautiful! You can make them multi-coloured like ours, or you can try using single coloured pom poms to give a more uniform look. They’re a great little ornament that will last for years!

Then stick a tiny pom pom onto the dab of glue.
It goes pretty quick!


Sunday, November 22, 2020

How To Declutter Your Bathroom

 To get started, all you need is a couple of boxes to hold items that you’ll be getting rid of and a large trash bag or two. You may also want to have a bin for items that you come across that belong elsewhere in your home, but that’s not really the focus of this particular challenge.  Once you’re ready to go, just set the timer and work in a systematic pattern around the room going quickly through all of your cupboards, drawers, and surfaces to see what you can get rid of.  I like working in one direction around the room but you could also work top to bottom if that works better for you. Pretend you are on a gameshow with the timer ticking and the audience cheering you on to gather as much stuff as possible!

Decluttered and organized bathroom space with neutral colors and dark wood tones.

QUESTIONS TO ASK WHEN DECLUTTERING THE BATHROOM

When it comes to decluttering, there are a few questions that you can continuously ask yourself as you go along to help determine if the item should stay or go.  If have you have think about your answer, chances are very likely that you don’t need it.  As you are evaluating your items, keep these questions in mind…

DO I USE THIS?

You shouldn’t really have to think long about this.  You either use it or you don’t.  Take note that the question is NOT “Will I possibly use this one day?”.

IS THIS PRODUCT STILL GOOD?

Remember that almost all beauty products have expiry dates. Most products will last around 6-18 months from the date that you open them. If you notice that the texture, color, or scent is “off”, it’s probably gone bad and should be discarded.

IS THIS ITEM EXTRA?

How many bottles of body lotion do you really need?  Do you really use that sparkling eye shadow? Evaluate what you need and use on a regular basis.  As mentioned above, almost all beauty products have a life span so it’s not always wise to “stock up”. Choose your favorite and toss or donate {if unopened} the extras!

WOULD I BUY THIS TODAY?

Ask yourself if you still love the item and if you would still buy it again today. I find this questions is especially helpful for bathroom decor items. Is it adding beauty or function to the space or is it just adding to the clutter?  For beauty products, think about whether or not you really like the colors on you, does it work for your skin type, is it as effective as you thought it would be, etc.  If the answer is no, it is time for it to go!

DOES THIS HELP TO MAKE MY LIFE EASIER OR BETTER?

There may be some items that you don’t really need, but you do use regularly and they help to simplify things or give you pleasure in life.  You can definitely splurge on some items – just make sure they are useful to you or provide you with joy.

CAN THE SPACE THAT THIS ITEM TAKES UP BE REDUCED?

For items that I am keeping, I always look for ways to reduce its footprint.  Can the packaging be removed for more condensed storage?  Do you have multiple bottles of the same product that can be combined?  Can you transfer the item to a smaller container?  Is there more appropriate storage that would make it easier to store and/or access?  It’s amazing what a little creativity can do to minimize space!

Acrylic bathroom cabinet organizer to store beauty supplies.

20 ITEMS TO DECLUTTER FROM THE BATHROOM

Are you ready to declutter the bathroom?  Here’s a list of 20 items to declutter from your bathroom. They may not all be applicable to you, but it should definitely give you a good start. Remember that items that are important to you might not be important to others, so just do you! Let’s get started…
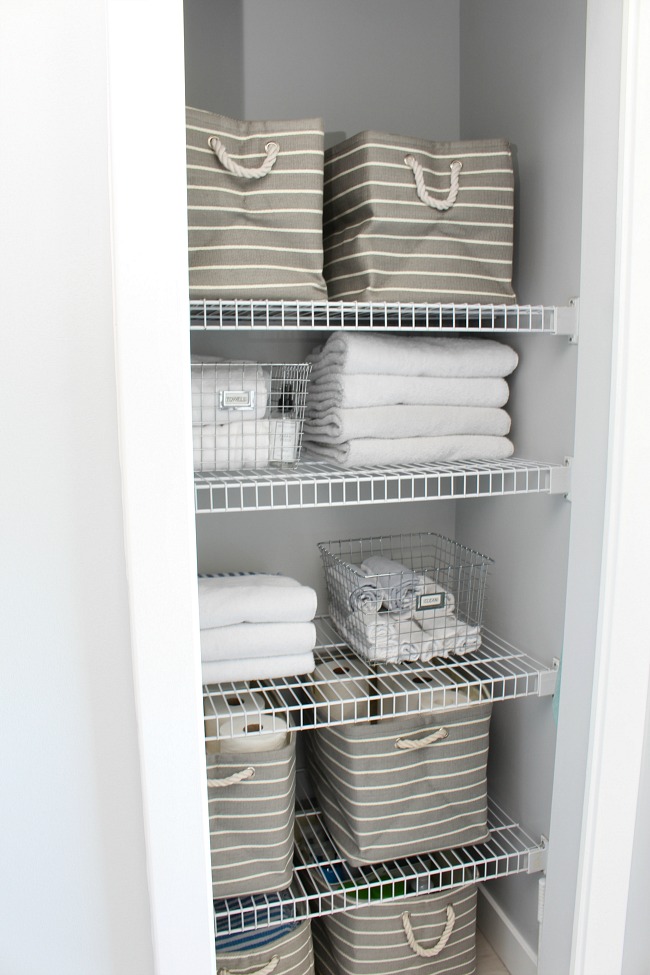
TOWELS

Take a good look at your towels and see if they are all in good shape.  For those that have seen better days, you can either use them for rags {if you NEED them!} or look at donating them to an animal shelter if they are still in decent condition.  Determine how many towels you actually need to have (I limit ours to two bath towels per person plus a couple of extras for the rare time that we have house guests stay overnight} and donate any extras.
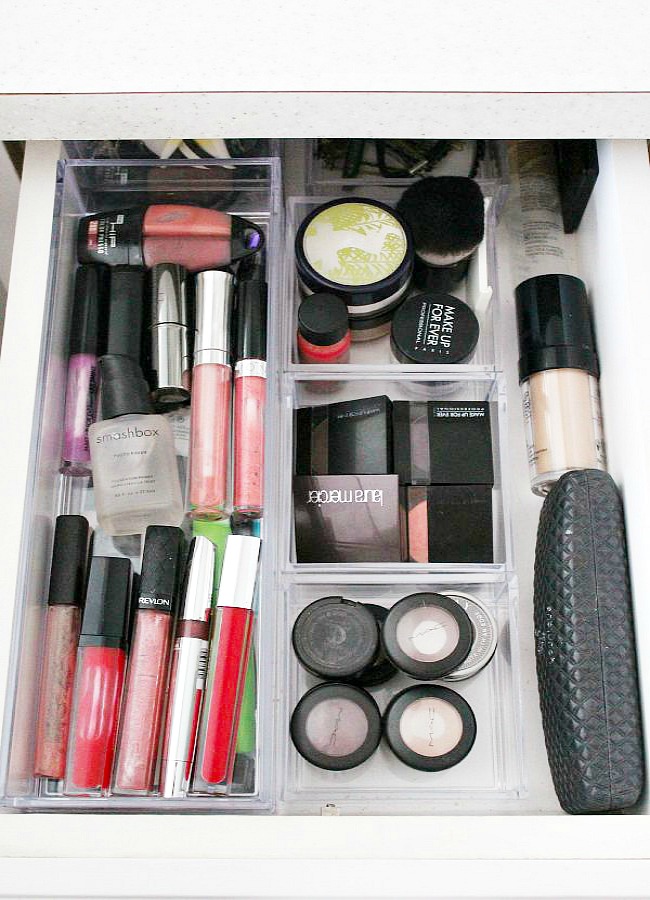
Decluttered and organized bathroom closet.

COSMETICS

Start by going through all of your make-up and tossing those items that are passed their expiry date. Next go through what is remaining and determine what you actually wear and what you don’t.  Unfortunately, some colors just look better in the packaging than they do when we put them on ourselves! Keep only what you use and makes you feel pretty.

Make-up drawer with acrylic drawer dividers.

MAKE-UP BRUSHES 

Go through all of your make-up brushes and pick out what you use and toss old brushes that may be losing fibers. Many times you buy a make-up brush set and only really need 2 or 3 of the 10 brushes that are included so make sure you are actually using what you keep.  Wash remaining brushes with some gentle baby shampoo and dry before putting away.

Bathroom cabinet acrylic organizers and make-up brush holder.

HAIR ACCESSORIES

Go through any hair ties, elastics, head bands, etc. and toss those that you no longer wear.  Store remaining items together.
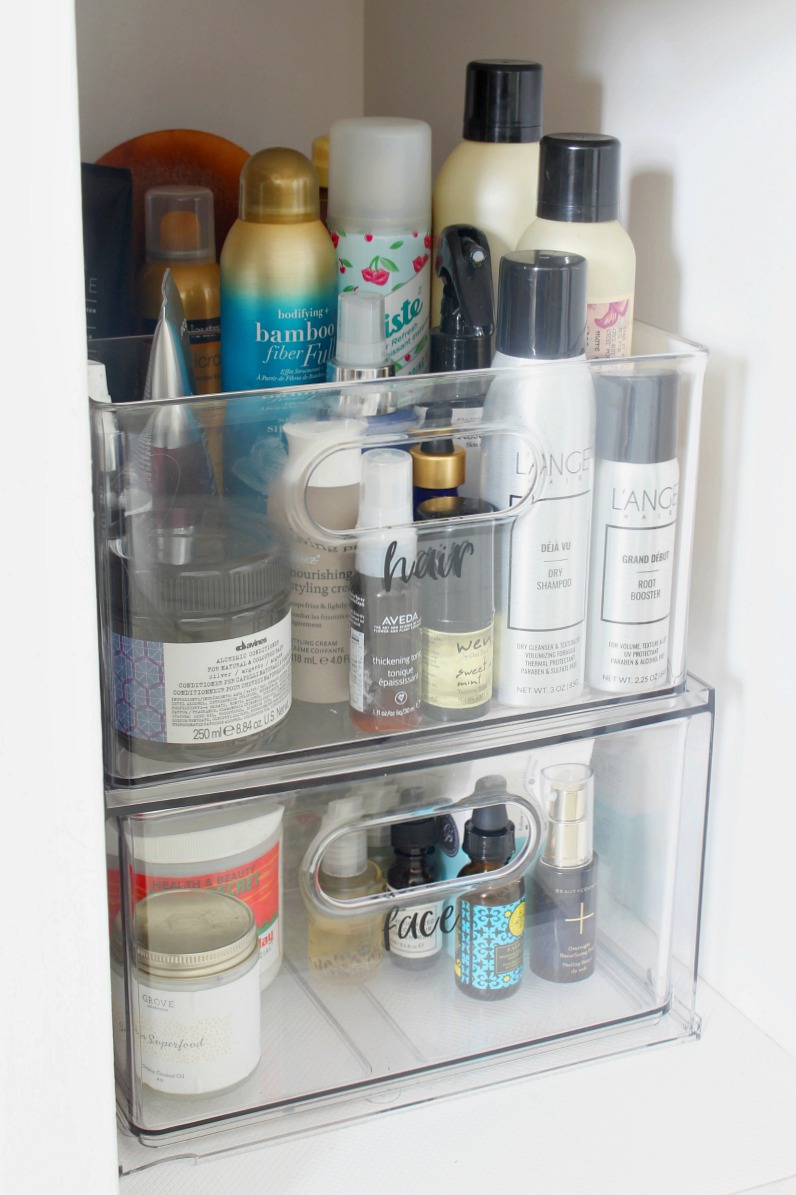
SKIN CARE PRODUCTS

Be ruthless. If it does not work for you, you do not use it {even if you wished you used it!} or if you prefer another product that serves the same purpose, let it go.  Smell all products and place a small amount in your hand to make sure that it has not gone bad.  I find that older products tend to take on more of a “chemical” smell to them or the texture is off.

HAIR PRODUCTS

Go through all hair products similar to what you did with skin care products.

Acrylic bathroom cabinet organizer.

NAIL PRODUCTS

Nail polish has a longer shelf life compared to a lot of other beauty items.  If stored properly {out of direct sunlight and in a cool, dark area} it should last for at least a few years. Look for changes in texture (clumpy nail polish is bad!) to determine if it needs to be tossed rather than how long you have had it.  Of course, just because it has not gone bad doesn’t mean you should keep it if you don’t use it so make sure you still like the color and actually have the time to apply it.  Store other nail accessories such as clippers, nail polish remover, files, etc. in a make-up tote or small bin.
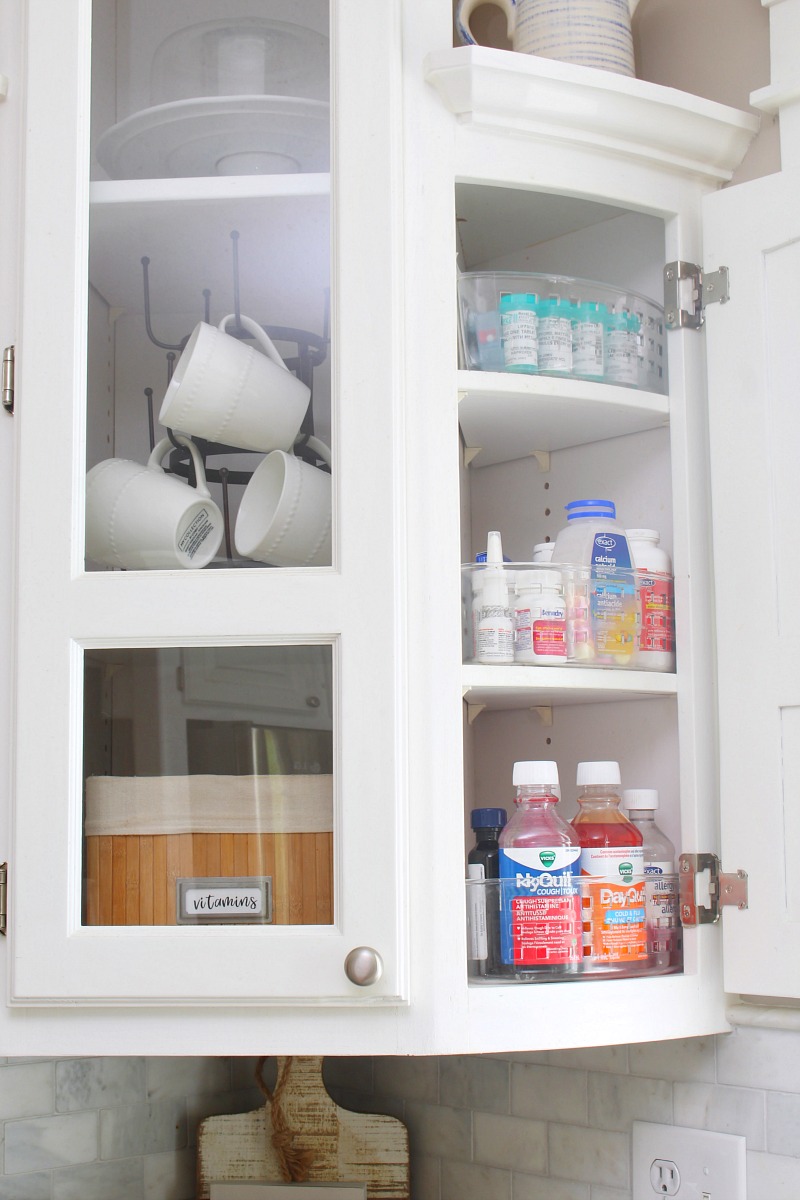
MEDICATION

Medication should ideally NOT be stored in the bathroom due to the temperature fluctuations and steam caused from the bath and showers.  Go through all medications and gather all items that have expired or you no longer need/use.  Toss in the garbage if safe to do so or return them to the pharmacy for safe disposal.  Find an alternative place to safely store your medication {such as the kitchen cabinets} if you have been keeping it in the bathroom.

BEAUTY APPLIANCES

Sort through all beauty appliances such as hair dryers, straighteners, curlers, foot baths, shavers, etc. and evaluate what you use and what you don’t.  There always seems to be something that we hold onto for that “someday” when you will have the time to use it, but if you haven’t pulled it out in the last 6 months, the chances are that you never will.  If you are holding on to that foot bath that you use once per year, maybe it would be better to get rid of it and just head out for a pedicure instead!

HAIR BRUSHES/COMBS

There seems to be a different sized/shaped hair brush for everything these days.  Toss what you don’t use and clean what you are keeping.
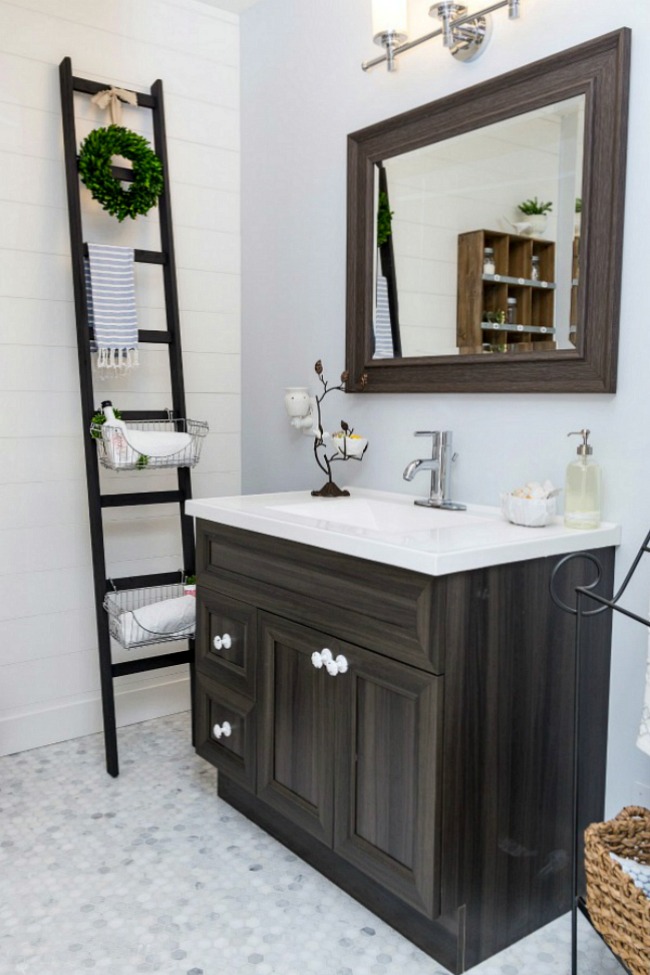
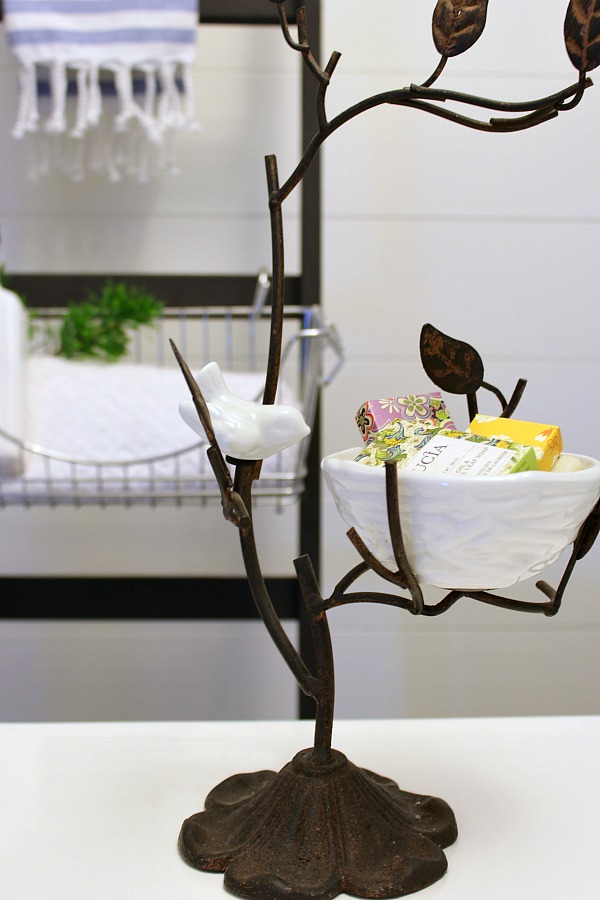
DECOR ITEMS

Take stock of any decor items that you have in the bathroom such as artwork, storage bins, and other accessories.  Ask yourself if it is adding to the space or if it is just producing clutter.  Keep those items you love and donate or toss any items that are no longer your style. When choosing decor items {especially in smaller spaces}, look for items that are both functional and pretty.
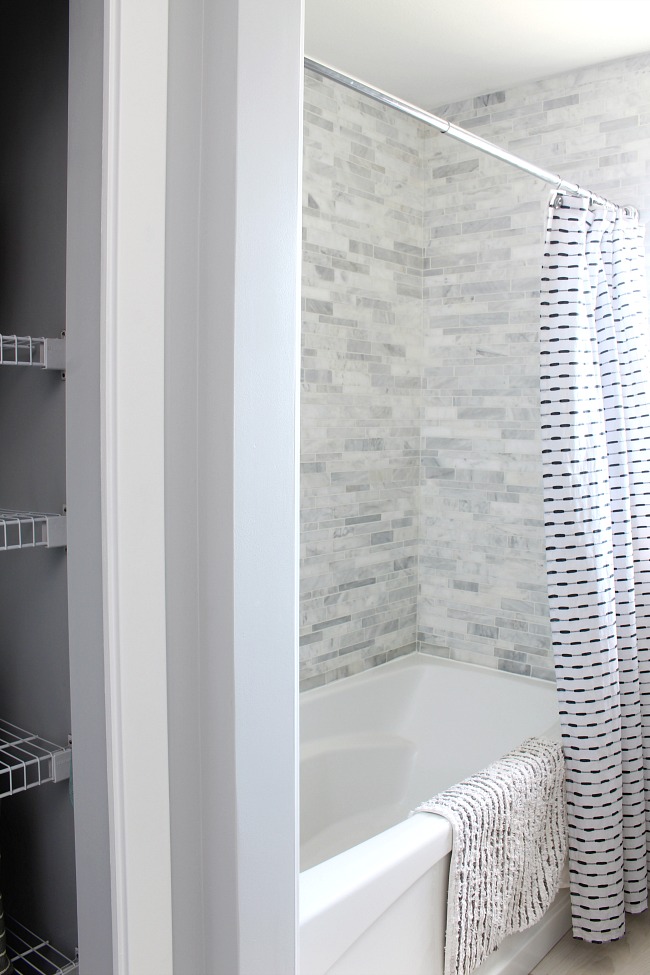
Pretty bathroom storage for hand soaps!

SHOWER CURTAINS

Plastic shower curtains can be washed in the washing machine using warm {NOT HOT!} water and hung to dry.  Eventually though, they do pass their prime and it is time to toss them for a new one.  If you have a cloth shower curtain, do you still love it?  Give it a wash if you do or donate/toss if it is time to update it.  A new shower curtain is a fun and inexpensive way to give your bathroom new life!

Bathroom makeover with a bath/shower combo with marble tiles.

TRIAL SIZED BOTTLES

If you have a ton of trial sized bottles that you picked up when traveling or received as free products when you purchased another item, it is time to use it or lose it.  While it’s nice to have one set of travel sized bottles for when you do go away, that’s all you need!  If you really love the product, commit to using up all of those little bottles first so you can get rid of the extra clutter. Items that are still sealed can be donated to a shelter but most will not accept any packaging that has been used or opened.

SHAVING/HAIR REMOVAL PRODUCTS

Toss old razors, and other items that you don’t use {maybe that home waxing kit?}. Test any electric razors to ensure that they are working properly and discard any extra accessories that you don’t use.

BATHROOM CLEANING SUPPLIES

Take stock of your cleaning supplies and toss those that you no longer use.  If you have multiple bottles with the same product, combine them.  Place those bottles that are close to empty towards the front of your stash so you will use them up first.  Look for cleaning products that can be used for multiple uses and minimize chemical cleaners as much as possible.
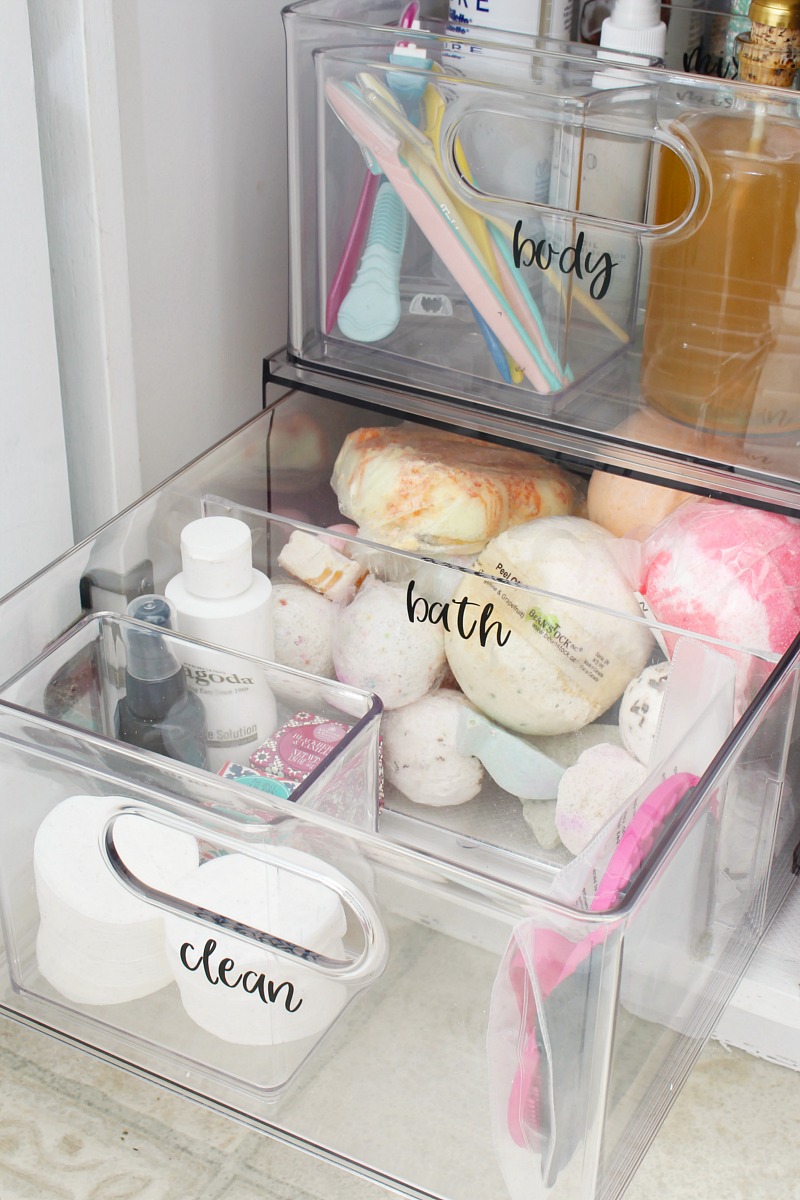
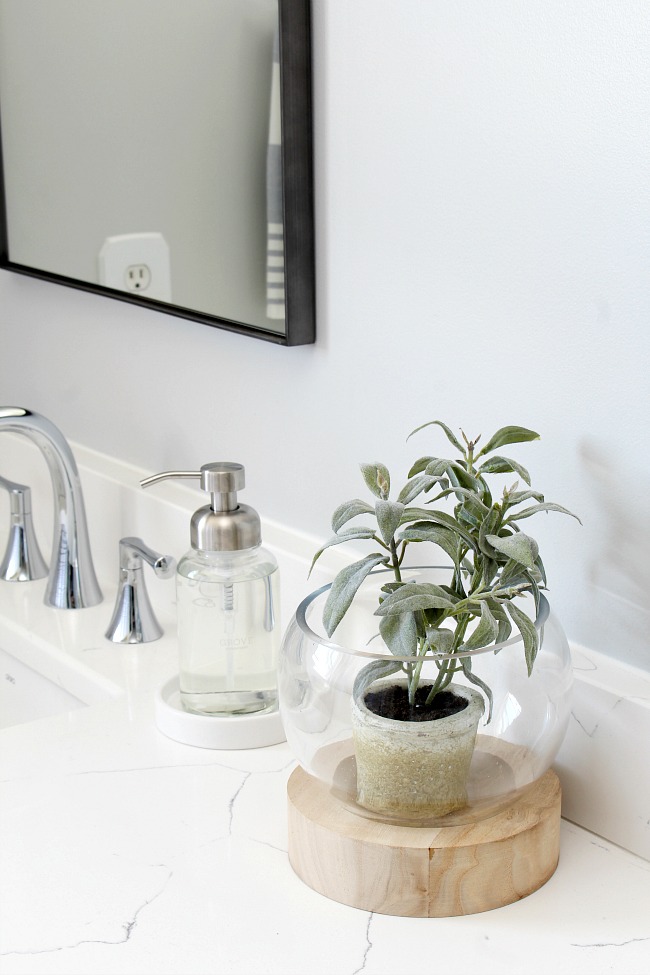
COUNTER CLUTTER

Counter space is generally prime real estate in the bathroom.  Try to store as many items away as possible {while still keeping them accessible} and keep only those items that you use all the time out {such as hand soap or hand lotion}.  Keep decorative items to a minimum depending on your space and make sure that you truly love them.

Glass and wood plant holder in a coastal style bathroom.

PERFUMES/COLOGNE

If you store perfume in your bathroom, ensure that it is stored away from heat vents and away from the steam of the shower {as it will make it break down quicker}.  Depending on the perfume and how you store it, most perfume will have a shelf life of about 3-5 years. Check all bottles to make sure that it is still good and you still love it {on you!}.  Think of how many bottles you have compared to how often you apply it.  If you have more than you can possibly use, donate it while it is still good and keep your top 2 or 3 favorites.

BATH TOYS

If you have younger kids, sort through bath toys to see what they still use and what they have grown out of.  For those toys that you would like to keep, check to make sure that there is no mold anywhere {especially those water squirting toys!}.  Discard worn toys.
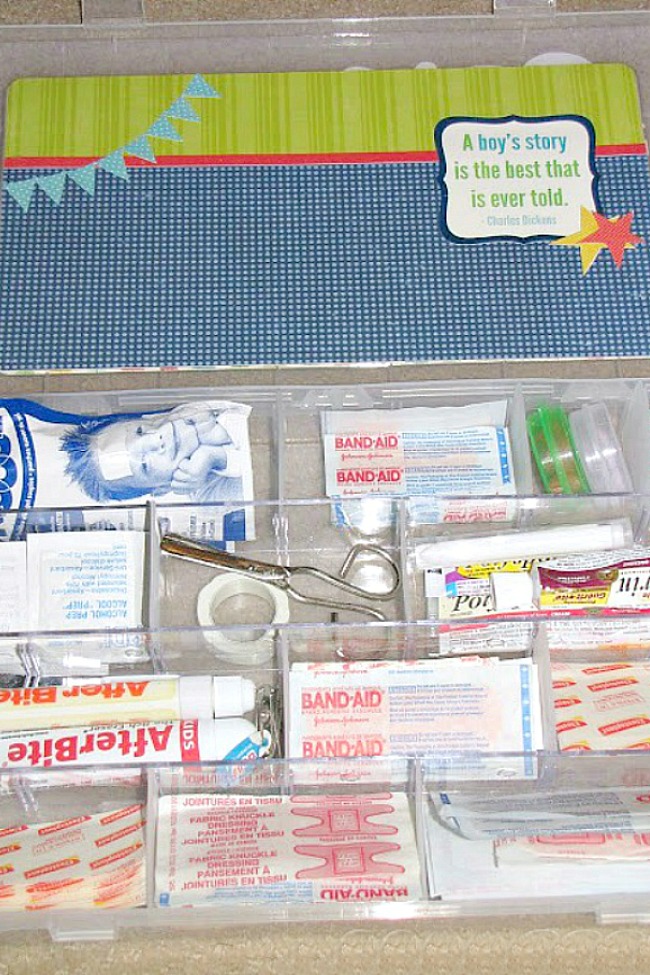
FIRST AID SUPPLIES

Check through all supplies and see what you don’t need as well as what might need restocking.  Check anything that has an expiry date to make sure that it is still good.  You can see our first aid organization here.

Organized first aid kit using a craft supply storage container.

Personal Care Items

I won’t go into details here, but go through them and see what you need! 


Saturday, November 21, 2020

DIY Dollar Tree Thanksgiving Decor

 These days everyone needs a cheap and simple way to decorate for fall so consider making on of these items to decorate with. All these items are from Dollar Tree so extra cheap!


  1. A little copper spray paint completely transforms these plastic pumpkins into an elegant centerpiece.

    SONY DSC


  2. This Fall Candle Centerpiece looks easy enough for even the craft-impaired like me.

    burlap-and-leaves


  3. I love how the wine glasses in this centerpiece serve double-duty.wine-glasses
  4. These pretty mason jar vases are perfect with the sunflowers, but you could fill them with any kind of fall foliage.

    fall-centerpiece


  5. This is actually a picture from a Pottery Barn catalog, but imagine how easy it would be to replicate these with some plastic pears and a can of gold glitter spray paint. potterybarnpears
  6. Got candy corn that nobody wants to eat? Use it to make a pretty fall bouquet.

    candy-corn-vase-halloween-centerpiece-1


  7. It’s hard to believe this hurricane centerpiece was made entirely with Dollar Tree supplies.

    dollar-tree-fall-hurricane


  8. Here’s a clever way to make a fall-themed pillow cover.

    leaf-pillow-cover


  9. This fall leaf garland is as easy as it is welcoming.

    fall-garland


  10. Those same leaves take an elegant turn when they’re gussied up with some metallic paint.


  11. This candle centerpiece takes about two minutes to put together, but it looks like it’s straight out of a magazine.

    fall-008-682x1024


  12. What’s seasonal decor without a wreath? I love this version from House of Hepworths.

    canva-photo-editor-10


Friday, November 20, 2020

DIY Thanksgiving Glasses

 These Thanksgiving Glasses will look great on any table during the holiday!

Happy Thanksgiving Day glasses


DIY Thanksgiving Glasses

yield:  2 GLASSES
 prep time:  10 MINUTES
 active time:  10 MINUTES
 total time:  20 MINUTES

Materials:
  • Cut File – I used a pre-made file from Cricut Access. 
  • Cricut 
  • Permanent Vinyl 
  • Transfer Tape 
  • Smooth Cups or Glasses 

Instructions:

Open the cut file and size it to fit your glasses. These glasses are right around 4 inches. So, my images were just over 2 inches tall. Weeding was a challenge for the smaller text, but, I love the end result!
Send the image to cut. Cut as many as you will need. I only put one image on each glass. But, if you wanted to put a turkey on the opposite side, that would be cute too!
While the vinyl is being cut, was the outside of the glass really well, and wipe it down with rubbing alcohol.
Weed the excess vinyl. Then use scissors to separate the images. Next, apply the transfer tape on each image. Use a scraper or even a credit card to smooth the transfer tape on the image.
Apply the image to the glass. The glasses I used were pure cylinders, so it was easier to apply the vinyl to them without wrinkling it. Use a scraper or credit card to smooth the vinyl on the glass. Then, remove the transfer tape.